27Jul
This year I have been taking my self out of my comfort zone both personally and creatively. So when https://identityleathercraft.com/ posted this years Makers Gallery brief, I jumped at the chance.
| For this years maker’s exhibition we will send the first 15 applicants 2 x A3 Heat Form Leather (lightweight and mediumweight) from our Heritage leather collection. Your brief is to make something/s wonderful from the leather, thinking about using the sculptural properties. |
Wow, something sculptural - right up my street. So I decided to make time to have a go. So after my brain going into hyperdrive, I reeled it back in and decided to create some lilies. Of course, if you create lilies, you need a vase so I decided to make one of those too!
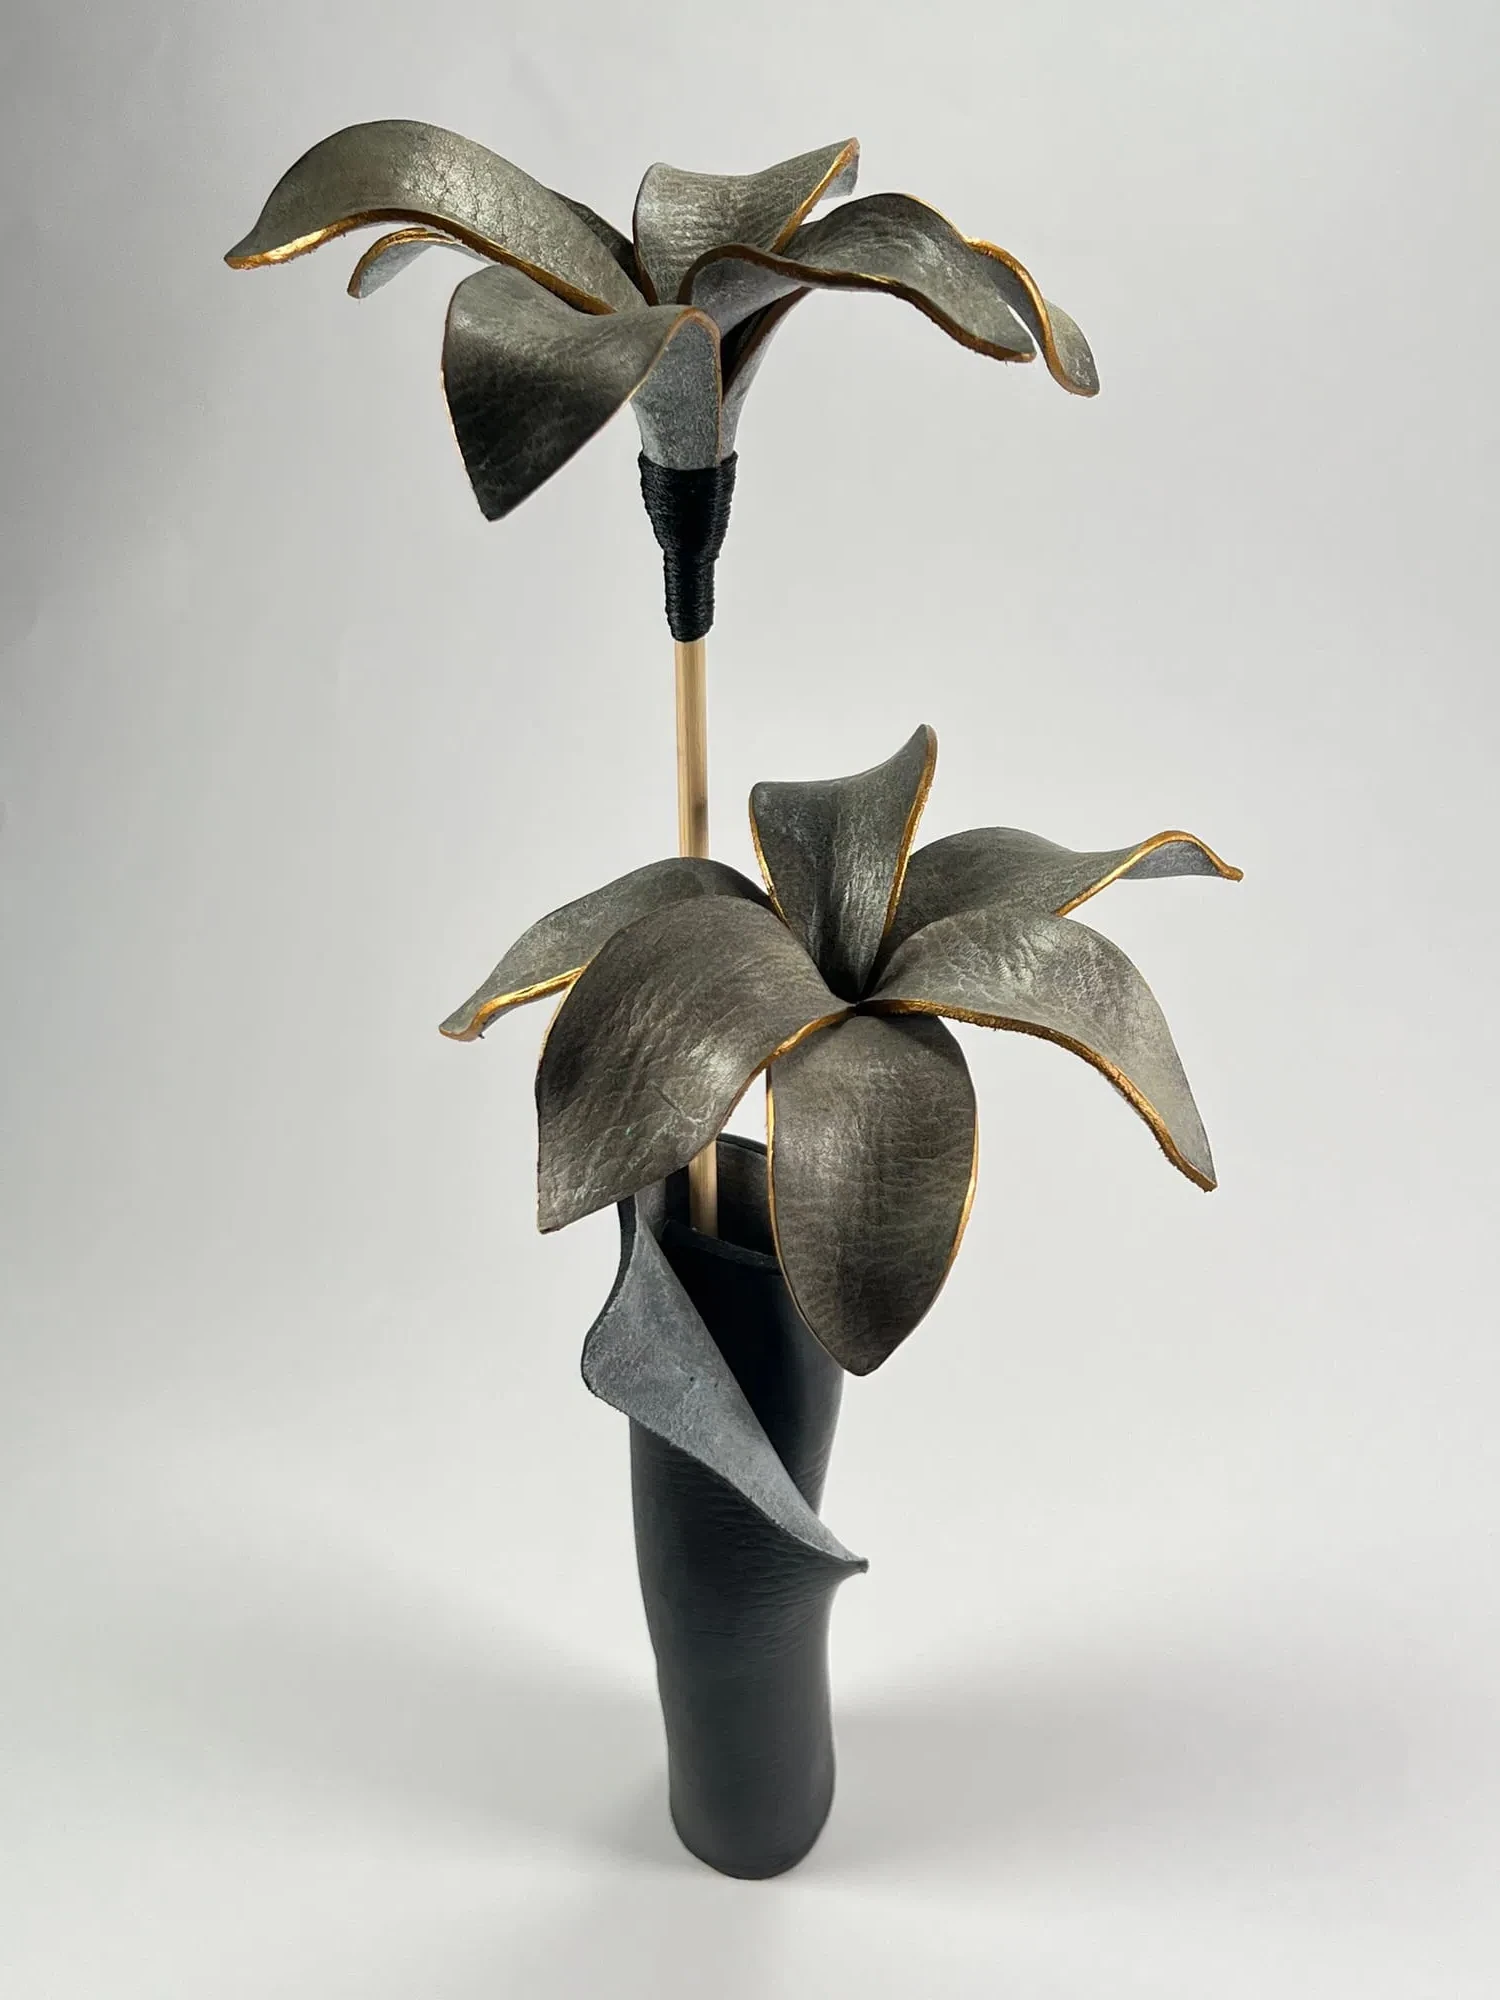
I decided to approach this as I a wire sculpture and broke it down into its constituent parts. So petals, stem and vase.
THE FLOWERS
Things I did and things I learned.
Step 1, cut out your petals. Now at this point I should have sorted the edges, both smoothing and gilding. Lesson learned! Also I should have skived the bottom parts of the petals whilst they were flat. Lesson learned!
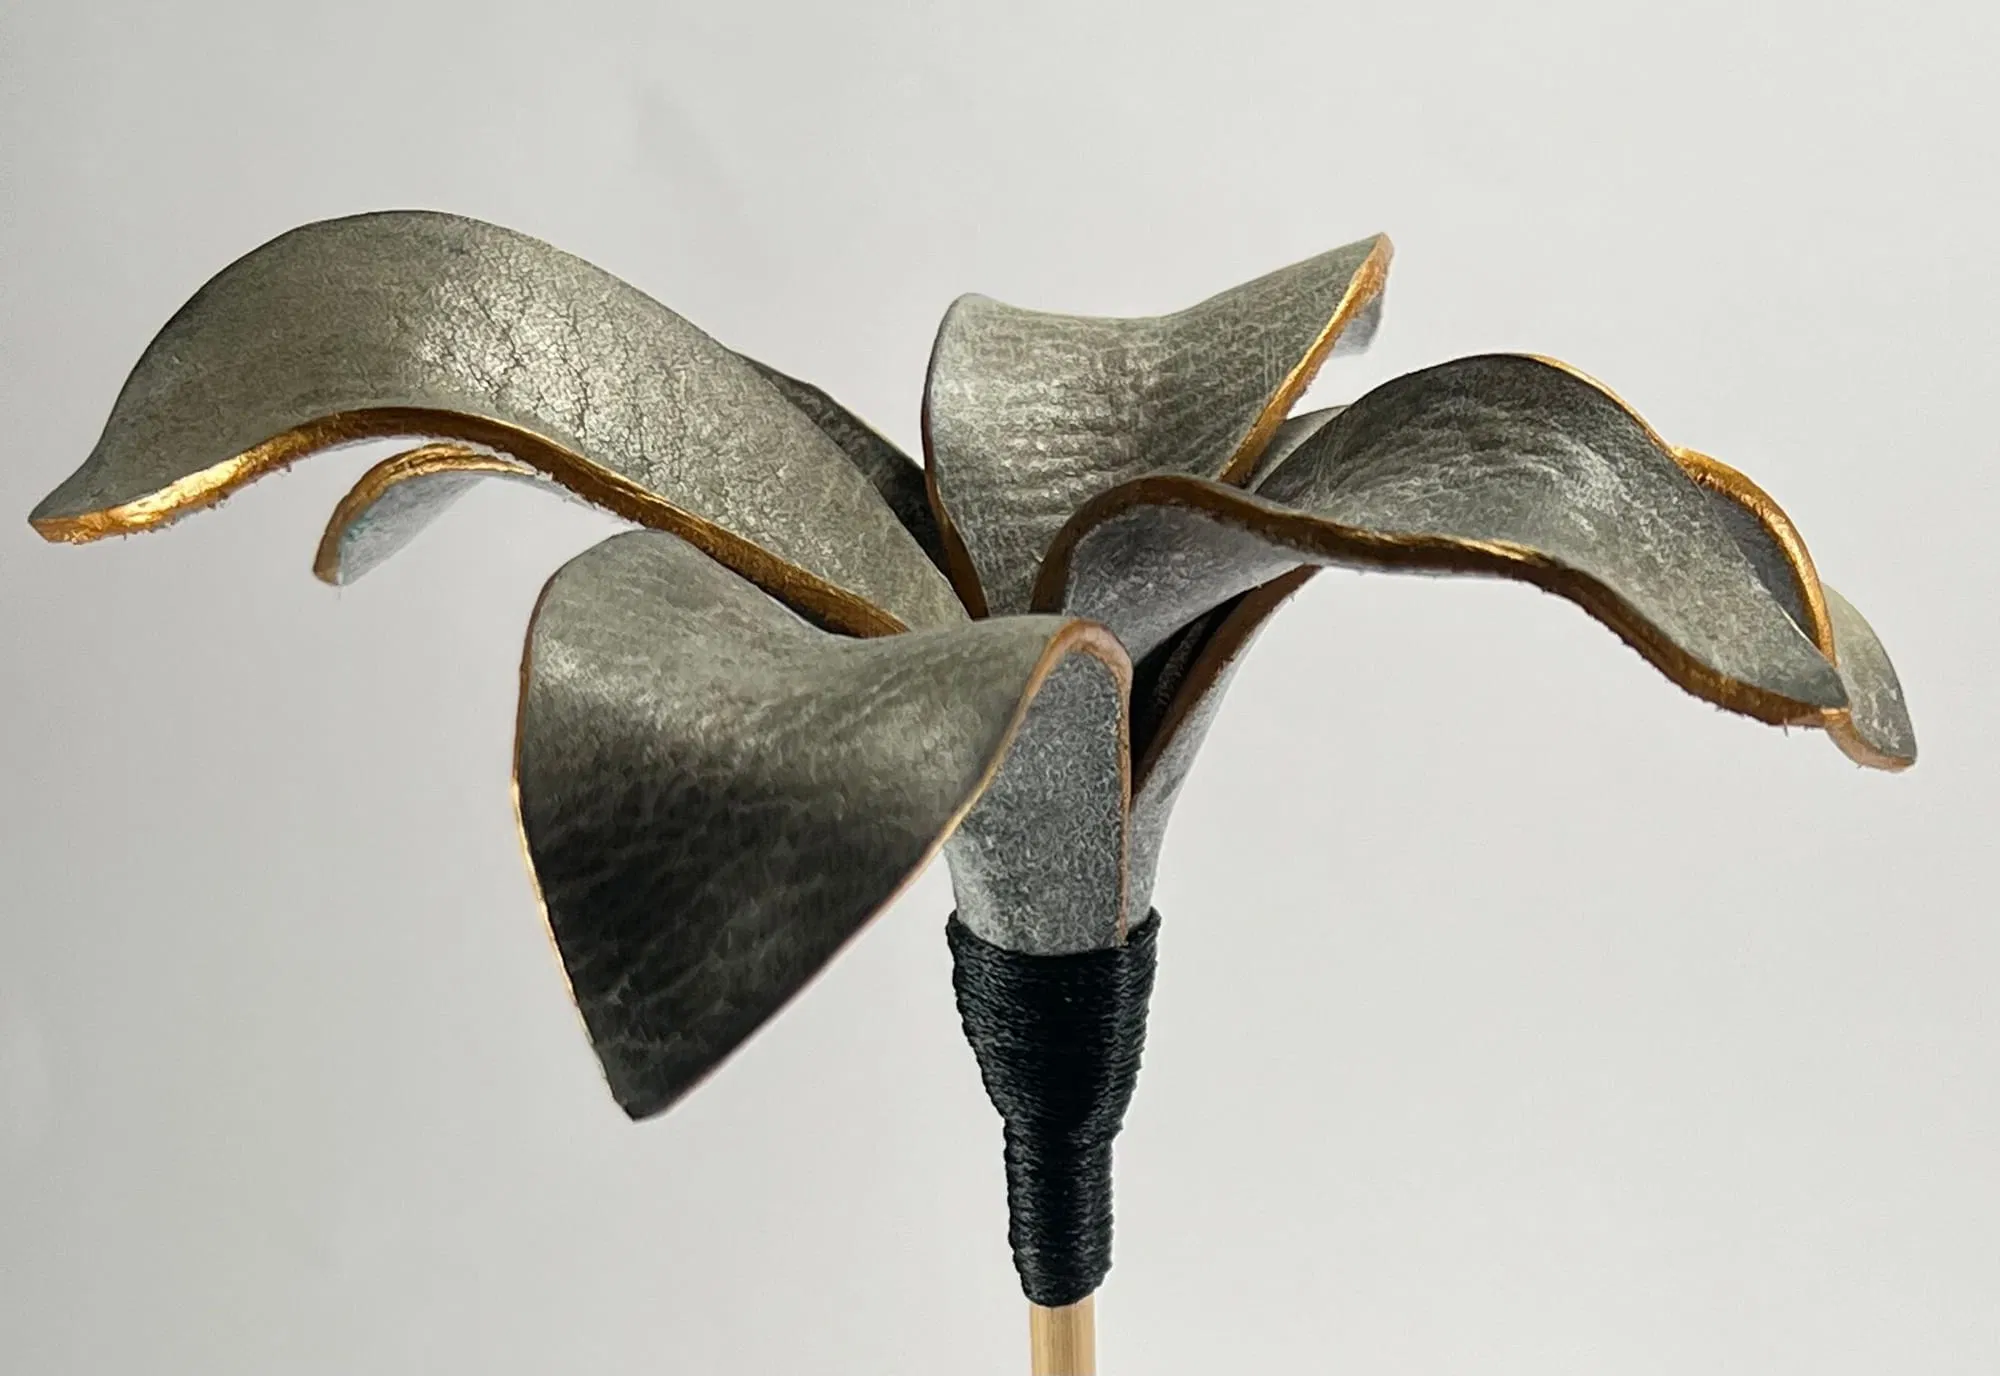
Next I tried cutting a stem from the heat form leather. Couldn’t get it to look how I wanted so changed tack and used wooden dowels instead. Loved the light pine colour against the grey the petals went after ironing so much that the gilded monochrome look seeded itself. I was initially going to paint the flowers but decided to leave them natural.
Next came the shaping. I ironed each petal and placed them between silicone fondant molds. These are too soft to leave an impression but meant that I was able to shape each petal holding them in place until set (approx 90secs before I let them go). Should have left the bottom of the petals flat until I was ready to glue them to the stem. Lesson learned! Once the petals were all set and the edges done (a mini craft iron works great here) then shape and fit the petals to the dowel. I did each flower in 2 layers giving the inner petals chance for the glue to go off before fixing the next.
Having fixed the flowers to the dowel, I decided to use waxed thread to bind over the dowel and the petals to cover the join. This is a binding knot so the ends can be hidden.
THE VASE
This was much easier to work out. I had in mind an organic/twisted form from the start. It is so structural and has such a modern feel to it that I had to give it a try. I cut an oblong out of the heavy leather then ironed it really well. There was no getting away from this, I was going to have to hold it until it set. Get some silicone gloves! Lesson learned!
I couldn’t hold it all and loved the way that the corner curled so I decided to make a feature of it. It turned out just as I’d hoped. Just one thing overlooked, it was narrow and the flowers tall and thus easily unbalanced. It would stand ok but was not going to take much to push it over. Flare the base next time or continue the curl out to create a stabiliser. Lesson learned!No water needed so I didnt need a seal but I still needed to give the vase a base. I glued the leather to another piece of the leather then cut away the excess.
Whilst the grey petals looked great, with the vase I wanted a more consistent colour so I airbrushed the outside black. I debated gilding the edges but decided to stick with the black so painted them in. There is still some variation but I am happy with that.
FINISHING TOUCHES
For both the flowers and the vase, I left the reverse side alone, liking the colour variation with the vase that showcased the curl back perfectly.
I decided to not to add the stamen in as I thought they detracted from the overall look.
The only thing left was to stabilise the vase by fixing it to a block of granite.

CONCLUSIONS
What a great learning exercise. Thank you Identity Leather Craft for the opportunity. Will I be doing more of these - oh yeah. Will I be using this heat form leather for other projects - oh yeah. Have I learnt anything - loads. Did I have fun - absolutely!!
Comments